Getting Started with Chef Solo. Part 3
WARNING: This article can be outdated. Better read my book about Chef: Cooking Infrastructure by Chef
Hello my dear friends. Today we will continue talk about Chef Solo. All example code you can find here: github.com/le0pard/chef-solo-example/tree/3.0.
In the previous article we learned Chef cookbook structure and wrote own Chef cookbook. In this article we will learn Chef role.
Create your cloud
We learned how to successfully use the Chef to setup servers. In most cases you cloud contain several servers with the same configuration. For example, you can have several web servers and one load balancer, which balance on this web servers. Or you can have several database or queue servers with identical configuration. In this case, it is very hard way to clone each server by nodes, because you need copy all attributes from one node to another. Maintain a system with such nodes also will be hard: you will have to modify the “n” number of nodes to change some attribute value. In this case we need to use the DRY. What we can do? We can use role! A role provides a means of grouping similar features of similar nodes, providing a mechanism for easily composing sets of functionality.
In Chef kitchen we can create roles: web, database and queue roles. Nodes may use one or more roles with recipes. Let’s look at an example.
Roles
Let’s create in our kitchen web role. Create in folder “roles” role “web.json”:
{
  "name": "web",
  "chef_type": "role",
  "json_class": "Chef::Role",
  "description": "The base role for systems that serve HTTP traffic",
  "default_attributes": {
    "app": {
      "name": "tomatoes",
      "web_dir": "/var/data/www/apps/tomatoes"
    },
    "user":{
      "name": "vagrant"
    },
    "nginx": {
      "version": "1.2.6",
      "default_site_enabled": true,
      "source": {
        "url": "http://nginx.org/download/nginx-1.2.6.tar.gz",
        "modules": ["http_gzip_static_module", "http_ssl_module"]
      }
    }
  },
  "run_list": [
    "recipe[nginx::source]",
    "recipe[tomatoes]"
  ]
}
The role require such attributes:
- “chef_type” - should be “role”
- “json_class” - should be “Chef::Role”
- “name” - name of role, in our case “web”
- “run_list” - list of recipes, like in node. We just moved run_list from “vagrant.json” node to “web.json”
Also Chef role can have “default_attributes” and “override_attributes”. What’s the difference? “default_attributes” an optional set of attributes that should be applied to all nodes with this role, assuming the node does not already have a value for that attribute. You can override this attributes values in node, which use this role. “override_attributes” an optional set of attributes that should be applied to all nodes with this role, regardless of whether a node already has a value for that attribute. Useful for setting site-wide values that will always be set, because even node attributes cannot override this attributes values. In our case I moved node attributes in “default_attributes” (and update nginx version).
Next, I edited the node for the usage web role:
{
  "run_list": [
    "role[web]"
  ]
}
And do not forget to specify vagrant that we had Chef roles:
VAGRANT_JSON = JSON.parse(Pathname(__FILE__).dirname.join('nodes', 'vagrant.json').read)

config.vm.provision :chef_solo do |chef|
   chef.cookbooks_path = ["site-cookbooks", "cookbooks"]
   chef.roles_path = "roles"
   chef.data_bags_path = "data_bags"
   chef.provisioning_path = "/tmp/vagrant-chef"

   # You may also specify custom JSON attributes:

   chef.run_list = VAGRANT_JSON.delete('run_list')
   chef.json = VAGRANT_JSON
   # old way
   #VAGRANT_JSON['run_list'].each do |recipe|
   # chef.add_recipe(recipe)
   #end if VAGRANT_JSON['run_list']

   Dir["#{Pathname(__FILE__).dirname.join('roles')}/*.json"].each do |role|
     chef.add_role(role)
   end
end
Now we can test Chef kitchen with web role:
$ vagrant provision
[default] Running provisioner: Vagrant::Provisioners::ChefSolo...
[default] Generating chef JSON and uploading...
[default] Running chef-solo...
stdin: is not a tty
[Mon, 07 Jan 2013 14:57:59 +0000] INFO: *** Chef 0.10.10 ***
[Mon, 07 Jan 2013 14:58:00 +0000] INFO: Setting the run_list to ["role[web]"] from JSON
[Mon, 07 Jan 2013 14:58:00 +0000] INFO: Run List is [role[web]]
[Mon, 07 Jan 2013 14:58:00 +0000] INFO: Run List expands to [nginx::source, tomatoes]
[Mon, 07 Jan 2013 14:58:00 +0000] INFO: Starting Chef Run for precise64

...

[Mon, 07 Jan 2013 14:58:04 +0000] INFO: Processing remote_file[http://nginx.org/download/nginx-1.2.6.tar.gz] action create (nginx::source line 58)

...

[Mon, 07 Jan 2013 14:58:12 +0000] INFO: Chef Run complete in 11.615968 seconds
[Mon, 07 Jan 2013 14:58:12 +0000] INFO: Running report handlers
[Mon, 07 Jan 2013 14:58:12 +0000] INFO: Report handlers complete
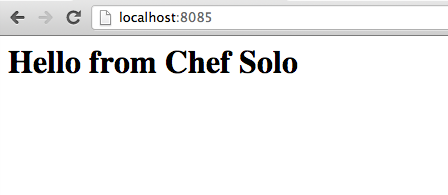
We should have see the same in your browser by this url “http://localhost:8085/”:
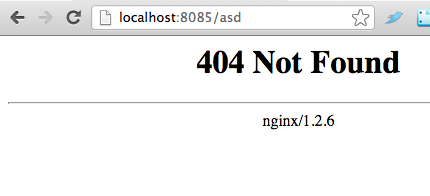
But nginx successfully updated:
Chef very flexible, because your node can use several roles and/or a several recipes simultaneously. For example:
{
  "run_list": [
    "role[web]",
    "role[db]",
    "recipe[monit]"
  ]
}
Summary
In the current article we have learn the Chef roles. In the next article we will learn more about Chef cookbooks.
All example code you can find here: github.com/le0pard/chef-solo-example/tree/3.0.
That’s all folks! Thank you for reading till the end.

